
If you’re wondering how to incorporate captivating Vue hover effects into your Vue.js projects, you’re about to discover some exciting solutions.
In this article, I will share my insights from working as a Vue.js software developer for over 5 years. We’ll show you how to leverage the power of the mouseover event in Vue to create stunning hover effects.
With our carefully crafted examples, you’ll be able to enhance user experience and make your web application shine. Let’s get started and unlock the magic of Vue hover!
No products found.
If you want to learn more about What Are Vue Views In Vue.js?
Vue Hover
Vue Hover provides functionality that allows developers to add interactive effects and behavior to elements when a user hovers over them with their mouse cursor.
What Is Vue Hover?
What Is Vue Hover? Vue Hover provides functionality that allows developers to add interactive effects and behavior to elements when a user hovers over them with their mouse cursor.
This makes it easy to create dynamic and engaging user experiences by applying changes to the appearance or behavior of elements based on hover events.
Enhancing User Experience in Vue.js with Dynamic Hover Effects
Getting Started with Vue Hover Effects
If you’re new to Vue.js or just looking for a quick refresher, hover effects are triggered when a user’s mouse pointer interacts with an element on your webpage.
These effects can be visual cues, such as color changes, or functional changes, such as displaying additional information.
Let’s begin with a simple example that changes the background color of a button when hovered over. In your Vue component, you might have a template like this:
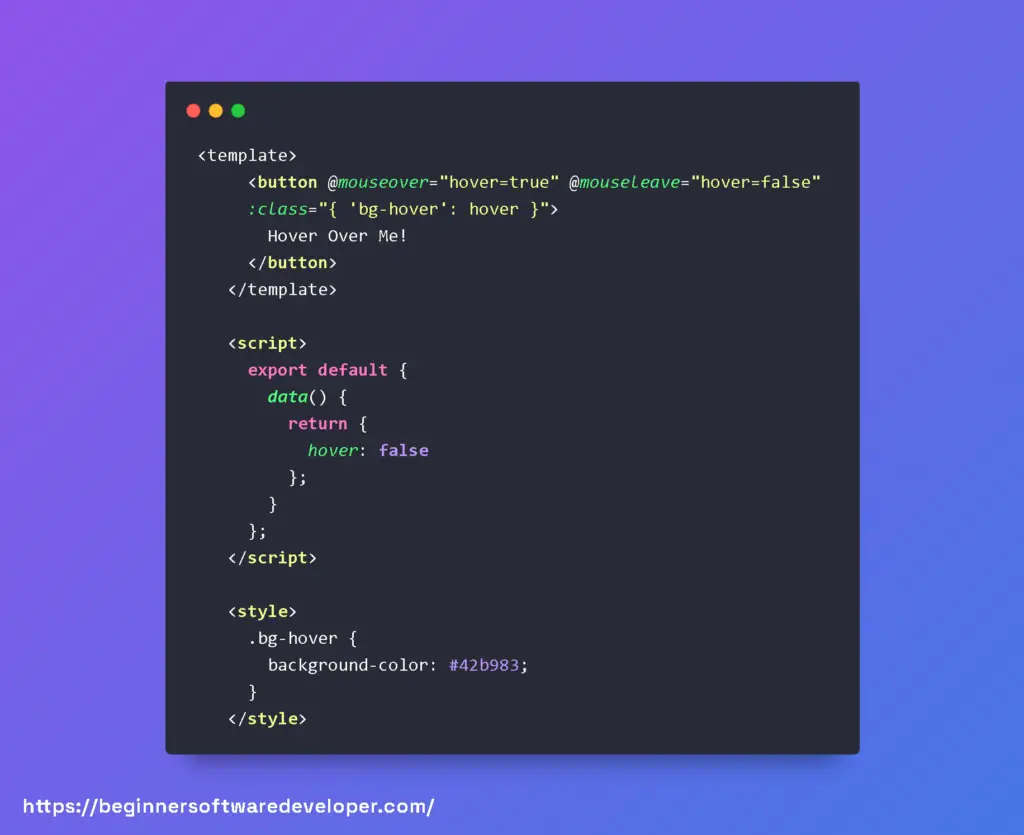

Here, we’ve used Vue’s event handling directives @mouseover and @mouseleave to toggle a data property that we then use to conditionally apply a CSS class.
Tips for Sleek Hover Effects
For even more captivating hover effects, consider these tips:
- Transition Ease: Use CSS transitions to make state changes smooth. This can be as simple as adding transition: background-color 0.3s ease; to your hover class.
- Dynamic Content: Beyond stylistic changes, hover effects can be practical. For instance, displaying tooltips or additional options for an item in a list.
- Directives Magic: Remember, Vue’s custom directives can be incredibly powerful for creating complex hover interactions.
Here’s an example of a tooltip effect:


When the span is hovered over, the showTooltip flag is set to true, and the tooltip div is displayed with a smooth transition.
Real-World Application and Best Practices
Applying hover effects in Vue.js can transform a static web page into an interactive and engaging user experience. These effects should be subtle and not interfere with the usability of your app.
- Keep It Responsive: Hover effects are not triggered on touch devices, so always ensure there is an alternative way to access the same functionality or information.
- Performance Matters: Avoid overusing JavaScript for hover effects that can be handled by CSS. This will keep your application snappy.
- Accessibility is Key: Ensure that your hover effects do not compromise accessibility. All information should be navigable via the keyboard as well.
We hope these tips and code snippets help you add a layer of polish to your Vue.js applications.
Captivating Users with Vue.js: Mastering Hover and Mouseover Interactions
Understanding how to work with hover and mouseover events can greatly enhance user experiences.
These events can trigger visual feedback, display additional information, or create delightful animations.
Let’s take a deep dive into incorporating these dynamic effects within Vue components in a way that sparks engagement.
Practical Code Example: Hover to Enlarge an Image
Starting with a simple and frequent use case, consider an image that grows slightly when a user hovers over it.
This can be readily achieved with Vue’s event handling system. Here’s a Vue component that encapsulates this behavior:

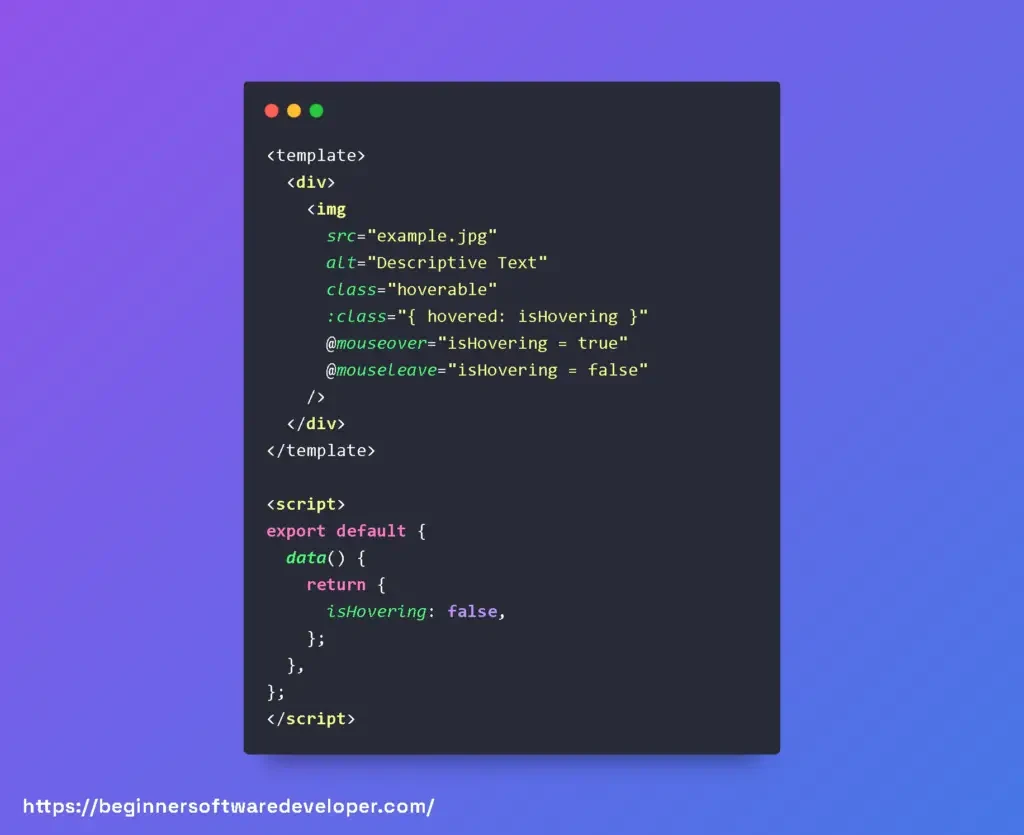
In this snippet, we declare an isHovering data property to track the hover state. We bind this property to the dynamic class ‘hovered’, which applies a scaling effect, triggered by the mouseover and mouseleave events.
Best Practices for Hover and Mouseover Events
When enriching your Vue components with hover interactions, consider the following tips:
- Debounce Rapid Interactions: If you are making API calls or performing intense computations on hover, debounce these actions to avoid unnecessary processing.
- Accessibility Matters: Make sure that the features triggered by hover are also accessible from the keyboard or through touch events for users with different abilities.
- Visual Cues: Provide clear visual feedback that an element is hoverable, like changing the cursor style with CSS.
- Mobile Compatibility: Remember that hover effects don’t translate directly to touch screens, so ensure to provide equivalent interaction hints for mobile users.
Enhancing User Interaction with Mouse Movement
Another intriguing experience you can create involves reactively updating component data based on mouse position:
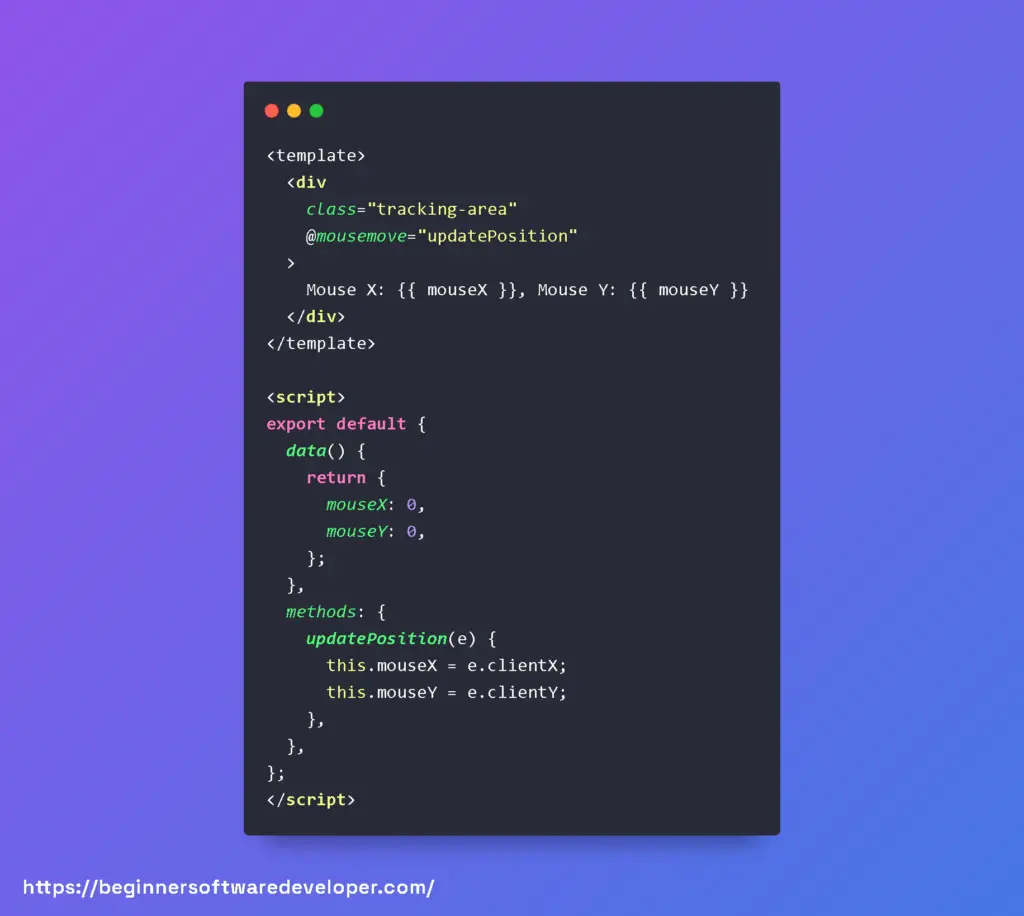

Here, we update mouseX and mouseY attributes with the mouse’s coordinates during the mousemove event, enabling us to create real-time visual effects that follow the user’s cursor.
Adding hover and mouseover events to enrich your web applications is both straightforward and powerful. By following these best practices and employing reactive data, you can craft interactive components that resonate with users and elevate their experience.
Unlocking the Power of Vue Hover Effects for Dynamic Web Interfaces
Let’s next explore the nuances of adding interactive hover and mouseover events to your web applications.
These events are critical in providing immediate feedback to users and can significantly enhance the user experience.
Let’s start by looking at a practical example of a Vue component that changes its appearance when the user hovers over it. Below is the code:
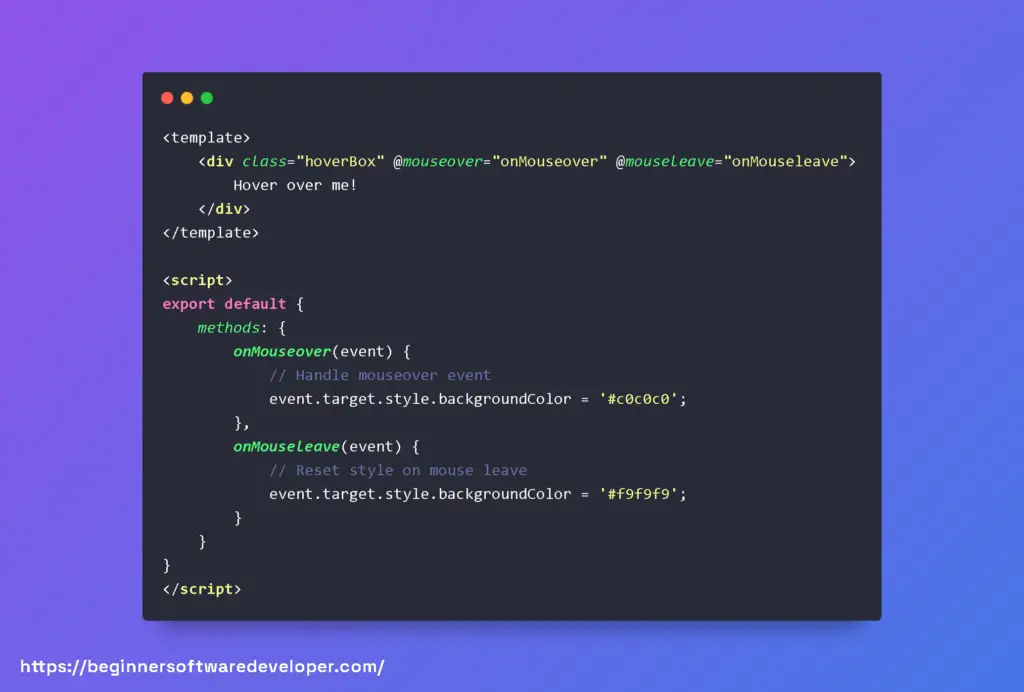

In this example, we have a div element with a class of .hoverBox. We’ve bound two events to this div: @mouseover and @mouseleave. In Vue, the @ symbol is shorthand for v-on:, which we use to listen to DOM events.
The onMouseover method changes the background color of the .hoverBox when a mouseover event occurs. Conversely, the onMouseleave method resets the background color when the mouse leaves the element’s area.
Here are some tips and best practices for implementing hover and mouseover customizations in Vue:
- Use CSS for Simple Hover Effects: If the effect is purely stylistic and doesn’t need any JavaScript logic, then consider using CSS :hover pseudo-class to keep your component clean and performant.
- Consider Accessibility: Make sure your hover effects do not rely solely on mouse events. Users navigating via keyboard or assistive technologies might not trigger these events, so provide alternative ways to interact with your elements.
- Debounce Rapid Events: For mouseover events that might occur rapidly in succession – such as when the element is within a moving carousel – it’s good practice to debounce the event to avoid performance issues.
Remember that while hover and mouseover can add interactivity, they shouldn’t be essential for using any functionality of your page – always aim for an accessible and inclusive design.
By harnessing the capabilities of Vue’s event handling with thoughtful design, you can craft a delightful and engaging experience that users will love.
Vue Hover Button
Vue Hover Button: Let’s take a look at an example of a Vue Hover button. Imagine you have a button element that you want to change its background color when the user hovers over it.
With Vue Hover, you can achieve this by attaching a hover event listener and updating the button’s style dynamically.
Here’s how you can implement a Vue Hover button:


In this example, we use the v-hover directive to bind the handleHover method to the button’s hover event.
The handleHover method takes a boolean parameter, isHovering, indicating whether the user is currently hovering over the button.
When the user hovers over the button, the handleHover method is called, and we can update the button’s style accordingly.
Vue Hover Tooltip
Vue Hover Tooltip: Another useful example of Vue Hover is creating tooltips that appear when the user hovers over specific elements.
Tooltips are small informational or descriptive pop-ups that provide additional context to the user.
Vue Hover simplifies the implementation of tooltips by allowing you to define the tooltip content and style based on hover events.
Here’s an example of a Vue Hover tooltip:

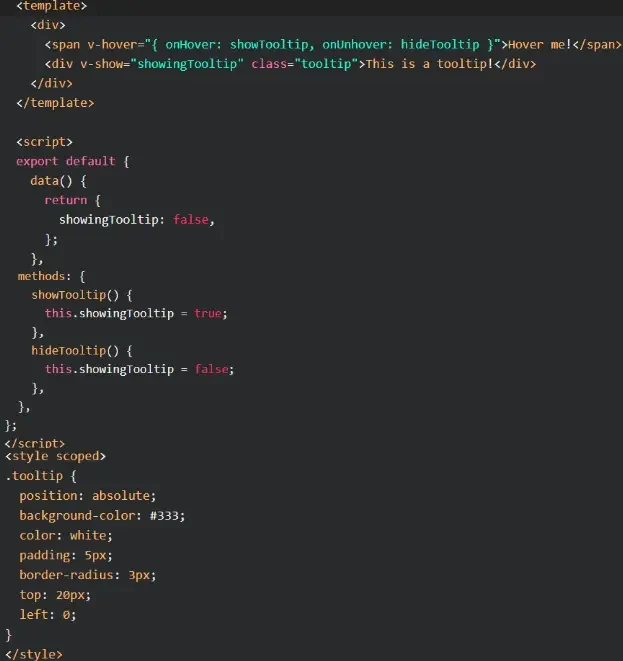
In this example, we use the v-hover directive to bind the showTooltip and hideTooltip methods to the span element’s hover events.
When the user hovers over the span, the showTooltip method is called, setting the showingTooltip data property to true and displaying the tooltip.
When the user moves the cursor away from the span, the hideTooltip method is called, hiding the tooltip by setting showingTooltip to false.
Vue Hover Event
Vue Hover Event: Vue Hover can also be used to trigger custom events when a hover event occurs. This allows you to execute specific actions or trigger functionality based on the user’s hover behavior.
Here’s an example of a Vue Hover event:
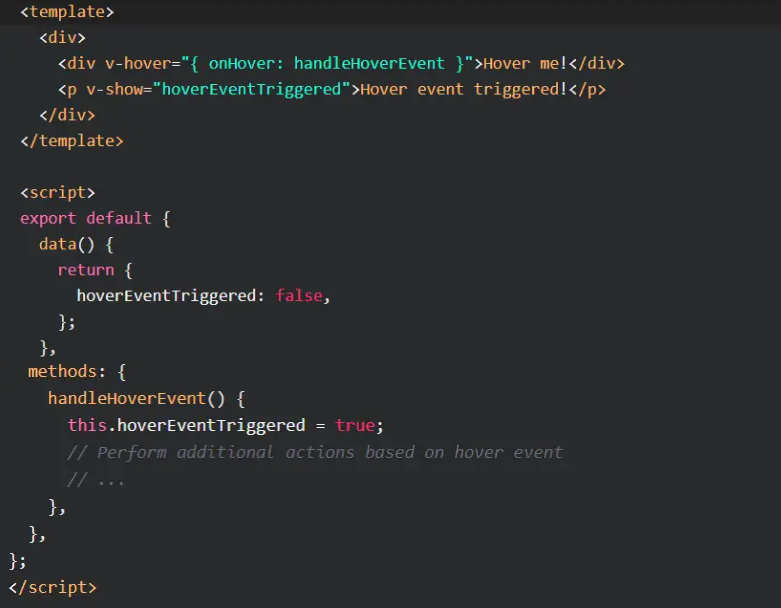

In this example, we use the v-hover directive to bind the handleHoverEvent method to the div element’s hover event.
When the user hovers over the div, the handleHoverEvent method is called, and we can perform additional actions or trigger custom functionality.
In this case, we update the hoverEventTriggered data property to true, which displays the “Hover event triggered!” message using v-show.
Check out my article about Vue Select Component Example.
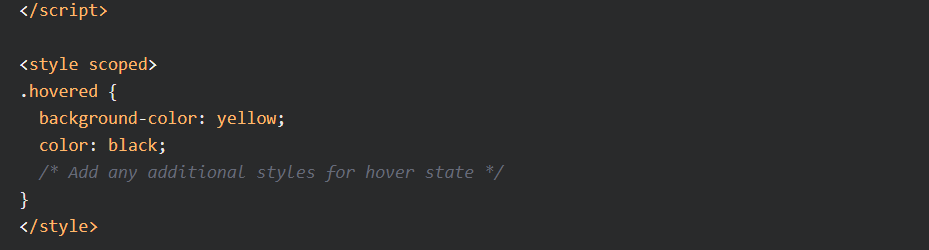
Vue Hover Style
Vue Hover Style: Vue Hover allows you to dynamically change the style of elements based on hover events.
This gives you the flexibility to apply different styles or animations to elements when the user hovers over them.
Here’s an example of Vue Hover style:

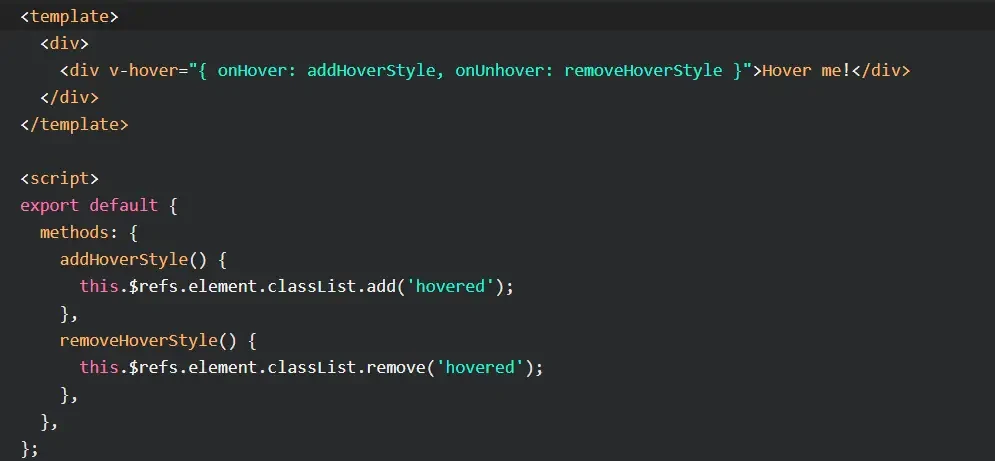
In this example, we use the v-hover directive to bind the addHoverStyle and removeHoverStyle methods to the div element’s hover events.
When the user hovers over the div, the addHoverStyle method is called, adding the hovered class to the div element.
This class defines the styles that will be applied when the element is hovered.
When the user moves the cursor away, the removeHoverStyle method is called, removing the hovered class and restoring the original styles.
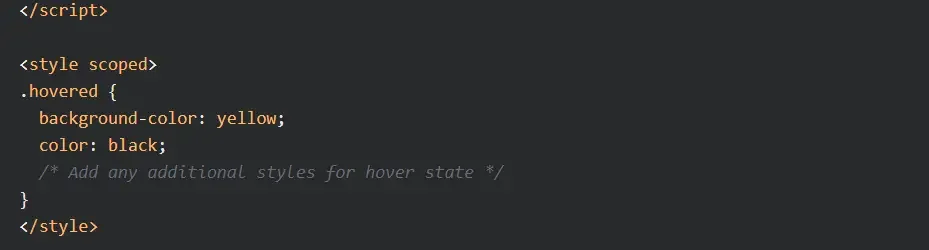
Vue Hover Class
Vue Hover Class: Vue Hover also allows you to toggle CSS classes based on hover events.
This is useful when you want to apply predefined classes to elements during hover interactions, enabling you to easily manage styles using CSS classes.
Here’s an example of Vue Hover class:
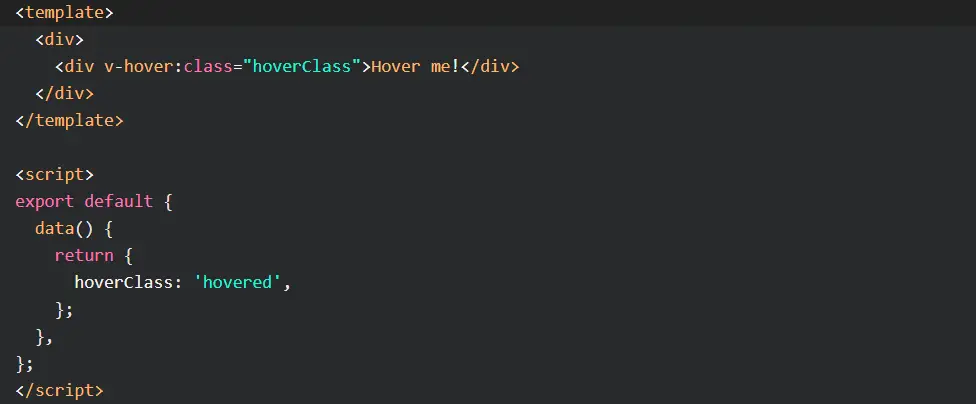

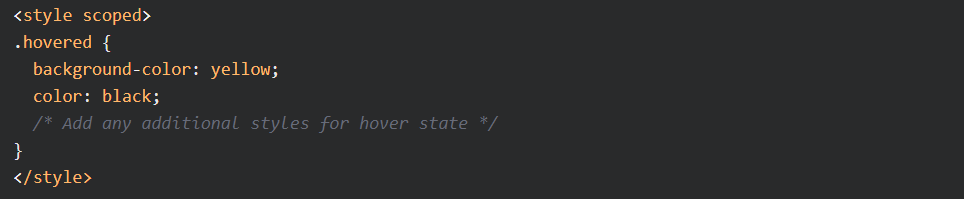

In this example, we use the v-hover:class directive to bind the hoverClass data property to the div element.
When the user hovers over the div, the hovered class is added to the element, applying the associated styles.
When the user stops hovering, the hovered class is removed, restoring the original styles.
Vue Hover Menu
Vue Hover Menu: Vue Hover can be particularly useful when creating interactive menus that respond to hover events.
You can show or hide menu items, change their appearance, or trigger actions when the user hovers over specific parts of the menu.
Here’s an example of a Vue Hover menu:
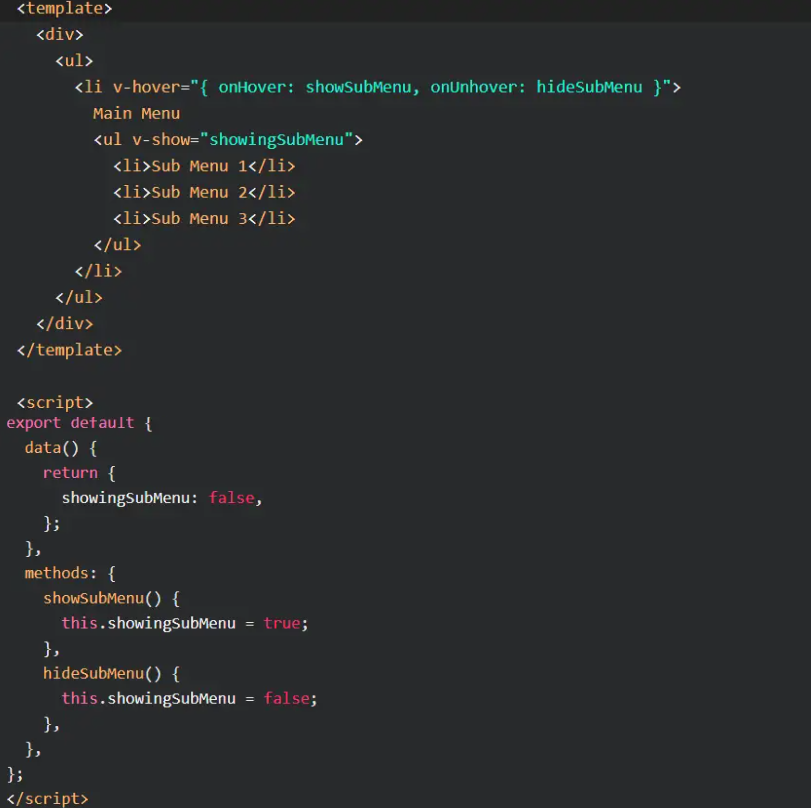
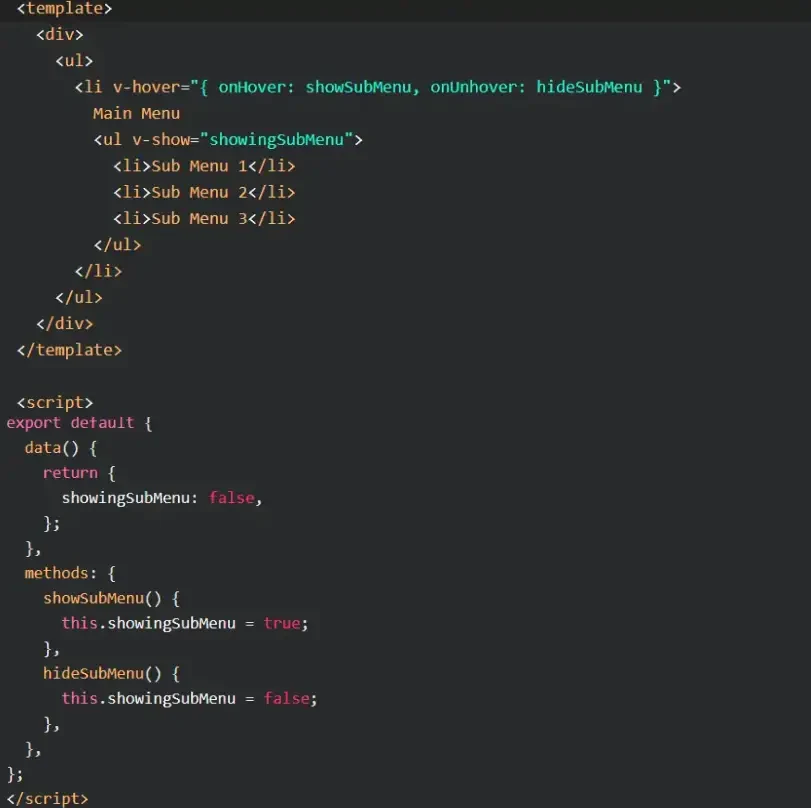
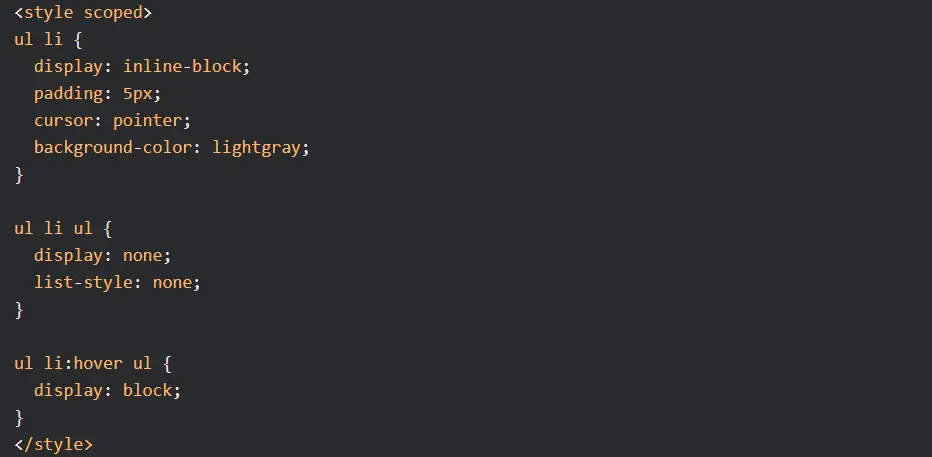

In this example, we use the v-hover directive to bind the showSubMenu and hideSubMenu methods to the main menu item hover events.
When the user hovers over the main menu item, the showSubMenu method is called, displaying the sub-menu by setting showingSubMenu to true.
When the user stops hovering, the hideSubMenu method is called, hiding the sub-menu by setting showingSubMenu to false.
The CSS styles define the appearance and behavior of the menu, showing the sub-menu when the main menu item is hovered using the :hover pseudo-class.
Don´t forget to check out my article about Vue js Multiple Checkbox Filter
Vue 3 Hover Event
Vue 3 Hover Event Example
Vue 3 Hover Event Example: In Vue 3, the hover event is a powerful feature that allows you to create interactive and dynamic behavior when an element is hovered over by the user.
By leveraging this event, you can enhance the user experience by triggering actions, animations, or changes to the UI based on the user’s interaction.
Let’s consider an example to understand how the hover event works in Vue 3.
Suppose you have a simple component that represents a button, and you want to change its background color when the user hovers over it.
First, let’s define the template for our button component:


Here, we bind the mouseover event to the handleMouseOver method and the mouseleave event to the handleMouseLeave method.
These methods will be responsible for changing the button’s background color when the user hovers over or leaves the button.
Next, let’s define the methods in our component:
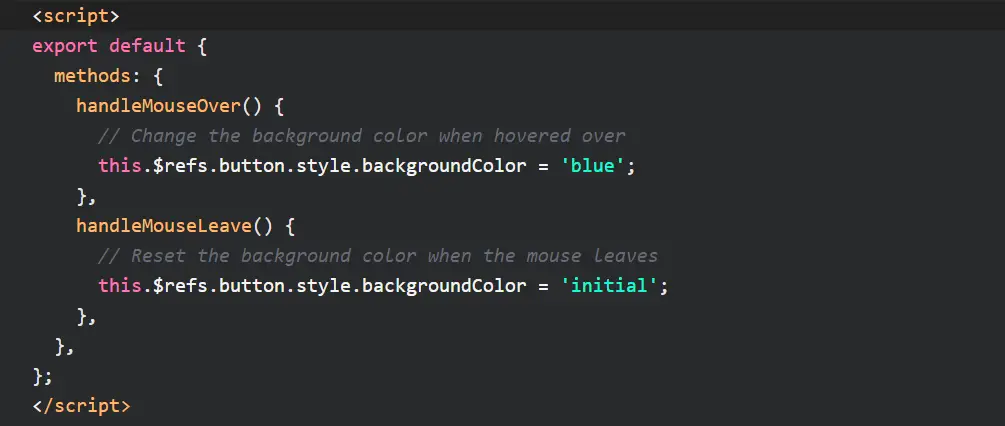

In the handleMouseOver method, we access the button element using the $refs property and modify its backgroundColor style property to ‘blue’.
This will change the button’s background color when it is hovered over by the user.
Conversely, in the handleMouseLeave method, we reset the background color to its initial state when the mouse leaves the button.
Vue Mouseover Mouseleave
Vue Mouseover Mouseleave Example
Vue Mouseover Mouseleave Example: The mouseover and mouseleave events in Vue provide additional flexibility when handling mouse interactions.
These events are triggered when the user’s mouse pointer enters or leaves an element, respectively.
By utilizing these events, you can create more sophisticated and dynamic behavior in your Vue applications.
Let’s explore an example to illustrate how the mouseover and mouseleave events work in Vue.
Suppose you have a component that represents an image gallery, and you want to display a tooltip when the user hovers over each image.
First, let’s define the template for our image gallery component:
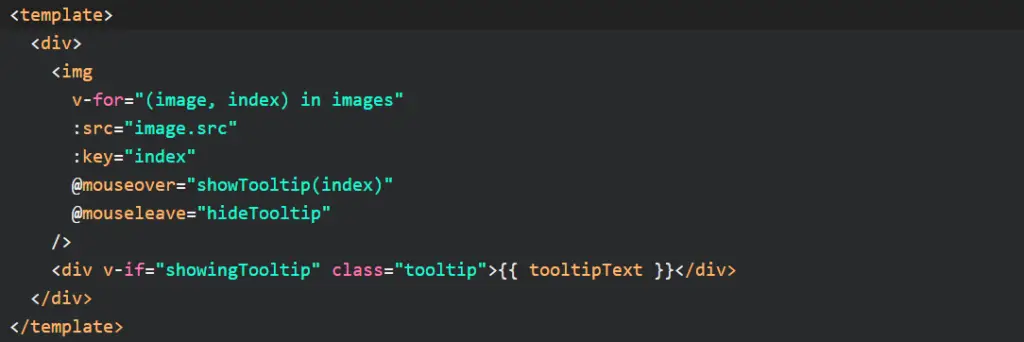
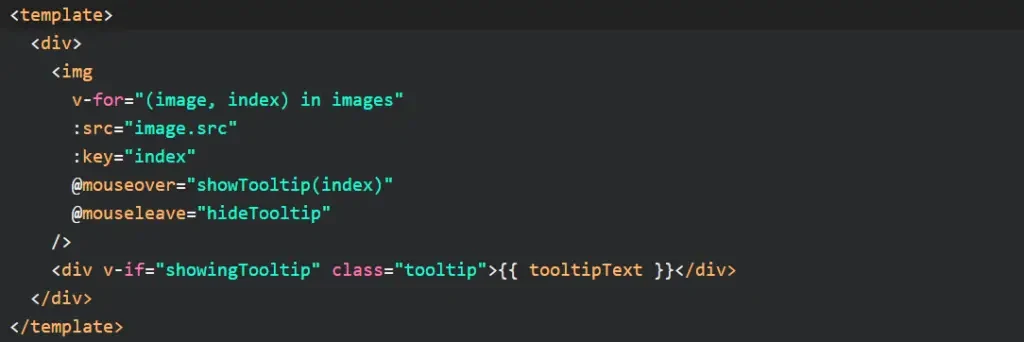
Here, we use the v-for directive to iterate over an array of images and dynamically render them on the page.
For each image, we bind the mouseover event to the showTooltip method and the mouseleave event to the hideTooltip method.
Additionally, we conditionally render a tooltip element when showingTooltip is true.
Next, let’s define the methods and data properties in our component:
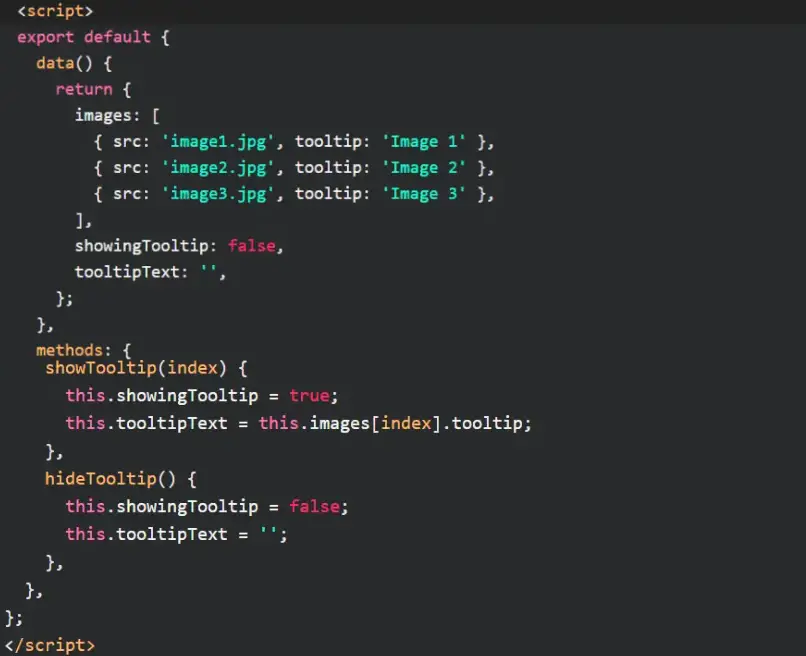

In the data property, we define an array of images, each having a source URL and a tooltip text. We also initialize the showingTooltip flag as false and the tooltipText as an empty string.
The showTooltip method takes an index as a parameter and sets showingTooltip to true, indicating that the tooltip should be displayed.
It also sets tooltipText to the corresponding tooltip text based on the image index.
Conversely, the hideTooltip method sets showingTooltip to false and clears the tooltipText, hiding the tooltip element.
Vue Mouse Events
Vue Mouse Events Example
Vue Mouse Events Example: Let’s explore an example to demonstrate the usage of mouse events in Vue.
Suppose you have a component that represents a card, and you want to change the card’s background color when the user clicks on it.
First, let’s define the template for our card component:


In this example, we bind the click event to the changeColor method. When the user clicks on the card, the changeColor method will be invoked to modify the card’s background color.
Next, let’s define the methods and data properties in our component:
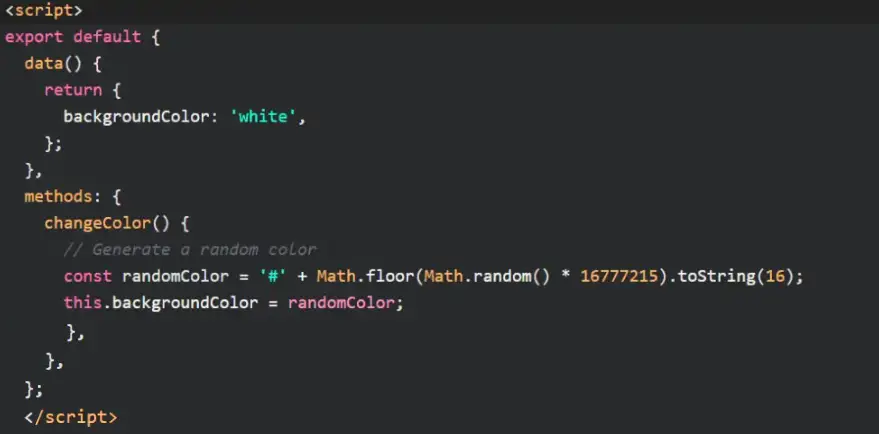

In the data property, we initialize the backgroundColor to ‘white’, representing the default color of the card.
The changeColor method is responsible for generating a random color and updating the backgroundColor accordingly.
Here, we use a simple algorithm to generate a random hexadecimal color value.
When the method is called upon a click event, it generates a new random color and assigns it to the backgroundColor property.
What Is The Difference Between Hover And Mouse Over?
The terms “hover” and “mouseover” are often used interchangeably in the context of mouse interactions.
While they share similarities, there is a subtle difference between these two concepts.
The hover event is typically associated with CSS and represents the state when the user’s mouse pointer is directly over an element.
It allows you to apply specific styles or behaviors to an element when it is being hovered over, enhancing the visual feedback for the user.
On the other hand, the mouseover event is an event provided by JavaScript frameworks, including Vue, and is triggered when the user’s mouse pointer enters an element.
It allows you to execute custom JavaScript logic when the mouse enters an element.
Related Articles
- How To Add A Vue Dynamic Class To CSS Dynamically In Vue.js?
- Vue Import Component Into Another Component
- Vue js Dropdown Menu Tutorial
- How To Implement In Vue js Google Login?
- How To Use Google Map Vuejs? Google maps examples
Hopefully, you now have a better understanding of how you can use Vue Hover.
Understanding how you can use Vue Hover is gonna help you with providing functionality that allows developers to add interactive effects and behavior to elements when a user hovers over them with their mouse cursor.